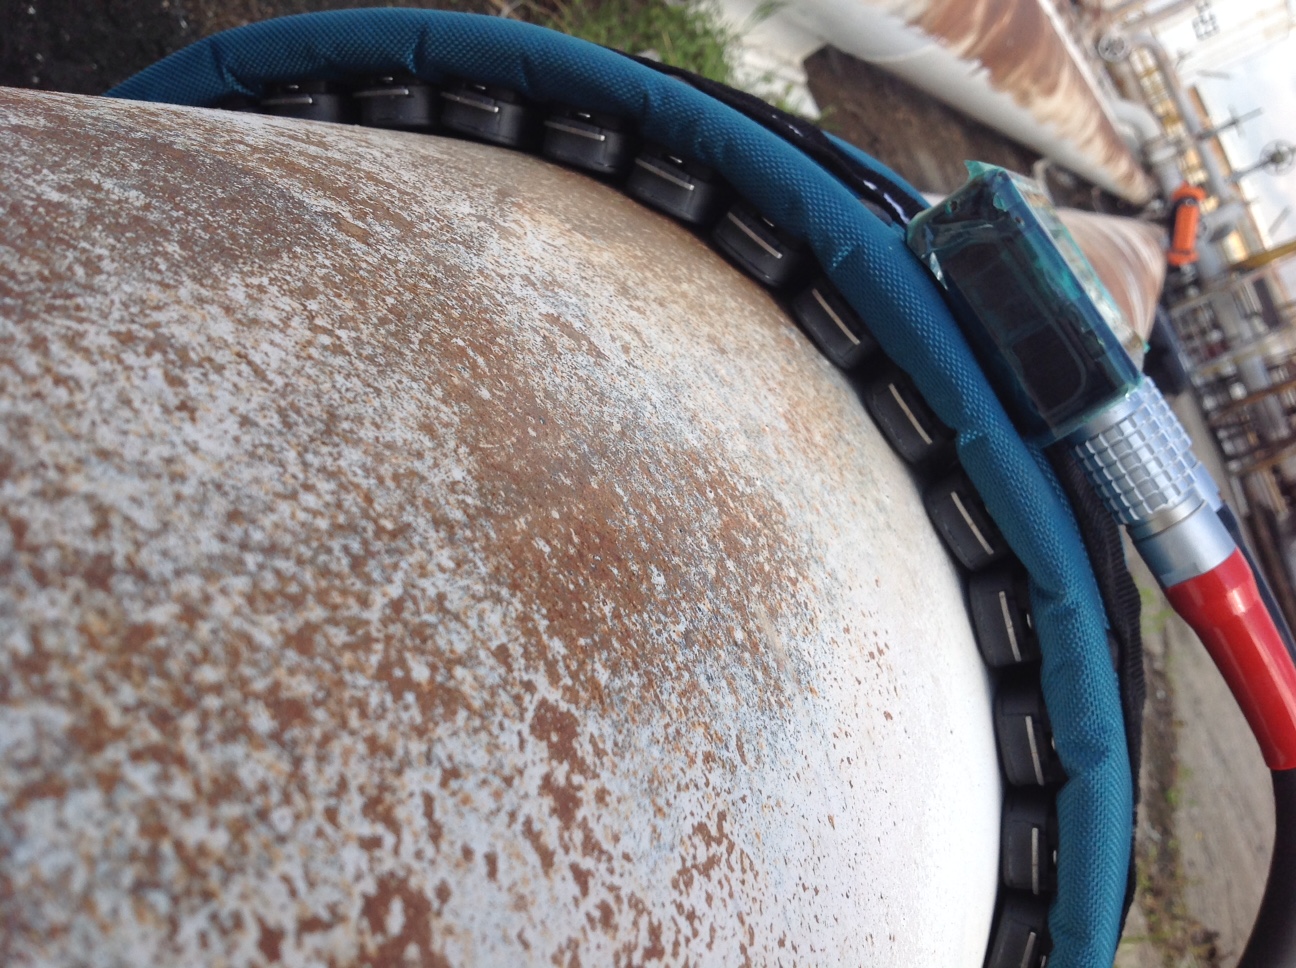
Guided Wave Testing (GWT) is used by Swiss Approval network, under the supervision of UK Advanced NDT staff of authorised Inspectors. The method is a well-established method for pipeline inspection.
GWT utilizes mechanical stress waves that are guided along the wall of the pipe and can travel long distances, so it rapidly provides close to 100% coverage. The transducer ring emits an ultrasonic wave at a chosen location on the line and then receives echoes returning from any features or discontinuities. The arrival time of the echoes indicates the distance of these reflectors from the transducer. The typical test range is 50- 100 m, but a range up to 500 m can be achieved, provided the pipe condition is excellent.
In some cases, there is no alternative inspection method, so the use of Guided Waves avoids expensive invasive investigations such as excavation.
GWT has become a well-established method for pipeline inspection. GWT is a screening technique, thus should be used to detect, locate, and classify discontinuities. Follow-up inspection with a quantitative non destructive testing technique, should be performed to precisely measure discontinuity dimensions. In other words, GWT provides detection, and local follow-up inspection, provides just the correct assessing of the severity.
Choice of Mode
For many years, the guided wave equipment used longitudinal waves. However, the last generation of equipment is using torsional waves. Swiss Approval owned equipment, is using the torsional mode, which is superior to the longitudinal mode, in the vast majority of applications. This is because of the following reasons:
- The torsional mode requires only two transducer rows
- The wave velocity does not change with frequency (non-dispersive mode)
- It is in-sensitive to liquids inside or outside the pipe
- There are two longitudinal modes propagating in the test range, which leads to false indications with this mode; the torsional mode does not have the problem of false indication.
Performing a Guided Wave Test
Guided wave equipment can display the results of the test as an A-scan, showing distance of an indication from the test position along the pipe, and as a C-scan, providing an unrolled pipe view.
Application Examples
Guided wave testing is applicable to a wide range of different scenarios, offering efficiency and coverage improvements, over alternative NDT methods.
Diameters of pipes to be inspected: From one (1) inch, two (2), three (3), four (4) inches, up to 50 inches.
Rapid Long-Range Screening
One of the main strengths of GWT is the rate of inspection coverage of pipelines that can be achieved. This is due to the ability to screen many meters of pipe from a single test point. During the inspection of 508 mm (20 in.) gas pipe, from a single installation of the transducer ring on the pipe, it was possible to inspect 230 m of pipe: 100 m in the negative direction and 130 m in the positive direction. The inspection results indicated that there was no corrosion present in the test range, but they did highlight misalignment in some girth welds.
Corrosion Under Insulation
The widespread problem of corrosion under insulation was one of the driving applications for the initial development of the method. With GWT, a short section of insulation (approximately 1 m) is required to be removed from the pipe in order to install the transducer ring. From this test position, many meters of pipe in either direction can be assessed for the presence of corrosion under insulation. This represents a significant improvement in productivity and integrity assurance over conventional techniques of inspecting for this type of corrosion (for example, radiographic techniques), which can miss degraded areas because they do not inspect the full cross section of the pipe.
High Temperature Pipe
Swiss Approval equipment has been specifically designed for the inspection of high temperature pipework, up to temperatures of 350 °C. In one example, a high temperature inflatable ring was used in the inspection of a 203 mm (8 in.) diesel pipe that was at a temperature of 240 °C. An area of corrosion was identified and followed up with conventional inspection techniques.
Accreditation ISO 17025
Swiss Approval Advanced Laboratory based in Europe, is currently under ISO 17025 accreditation process.

